

Keyboard Typing Finger Position Practice Online Free
Correct finger placement makes touch typing easier to learn because every key has a predictable finger and every reach has a home position to return to.
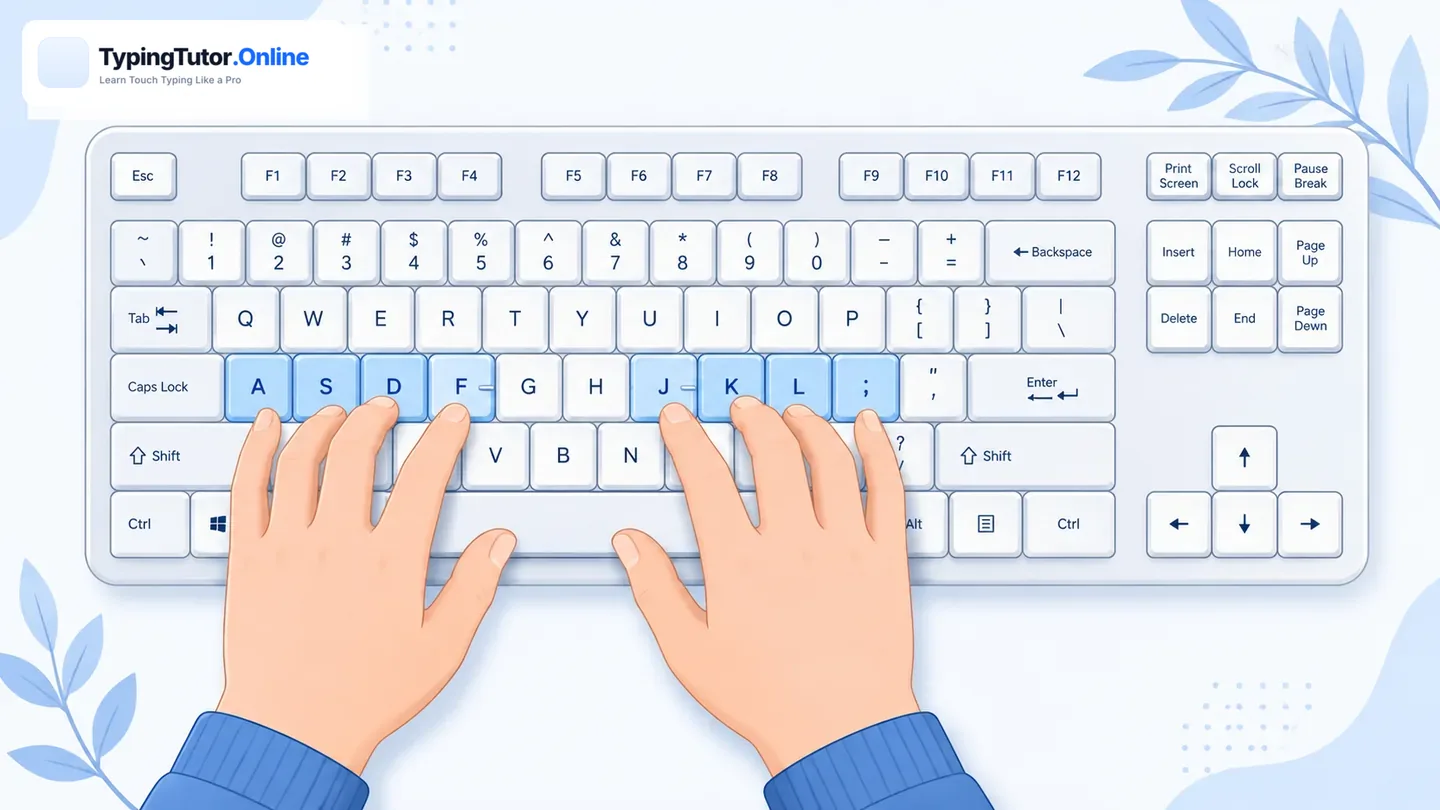
The home row is your reference point
For standard QWERTY touch typing, the home row is A S D F for the left hand and J K L ; for the right hand. The index fingers rest on F and J, which normally have small tactile marks. These marks let you relocate the home position without looking at the keys.
Which finger types each key?
Each finger controls a vertical or slightly diagonal group of keys. Index fingers handle the largest zones because they also reach inward to G, H, T, Y, B and N. Little fingers handle outside keys such as Q, A, Z and P, semicolon and slash, while Shift is normally pressed with the opposite hand from the capital letter.
Free online finger-position practice
A static diagram can explain the mapping, but guided practice teaches the movement. Use a lesson that highlights the expected key and finger, then type without looking down. Repeat the same reach until you can return automatically to the home row.
See the full finger map Practise with guided hands
Common finger-position mistakes
- Moving the whole hand instead of one finger.
- Using the index fingers for nearly every key.
- Leaving a finger on the top or bottom row after a reach.
- Looking down after each keystroke.
- Holding the wrists too high, too low or sharply bent.
How long does finger placement take to feel natural?
There is no single number of days. The useful measure is whether the same key can be reached with the same finger repeatedly without conscious searching. Short daily sessions are usually more useful than memorising the map and then trying to type at full speed.
Finger zones on the top and bottom rows
The same finger relationships continue above and below the home row. The left little finger reaches Q and Z, the ring finger reaches W and X, the middle finger reaches E and C, and the index finger covers R, T, V and B. On the right side the index finger covers Y, U, N and M, followed by the middle, ring and little fingers for the remaining outer columns.
How Shift should work with finger placement
For a single capital letter, press Shift with the hand opposite the letter. For example, hold the left Shift while the right hand types a capital J or K. Use the right Shift when the left hand types a capital A or F. This preserves the normal finger position instead of forcing one hand to perform two jobs at once.
Use touch feedback as well as visual feedback
The F and J bumps are physical landmarks. With practice, they become a faster way to reset the hands than looking at the keyboard. If your fingers drift, deliberately find those two keys again and rebuild the home row around them.