How to Learn Typing for Beginners on a Laptop or Keyboard
Want to know how to learn typing on a laptop or desktop keyboard? Start with a comfortable hand position, practise a few keys at a time and check accuracy before trying to go faster. You can follow this free beginner route without installing software.
How to learn typing on laptop: start with your keyboard setup
Learning to type on a laptop uses the same touch-typing principles as a full-size computer keyboard. Laptop keys may feel closer together, and the touchpad can sit near your palms. Put the laptop on a stable surface, sit where your shoulders can relax, and leave your wrists comfortably straight instead of bending them upward. If the screen is too low or close, consider a laptop stand with an external keyboard, where practical.
- Place the laptop or keyboard directly in front of you, with enough room for both forearms.
- Keep your shoulders relaxed and elbows close to your sides. Use light key presses rather than force.
- Find the small raised marks on F and J. They help you relocate your hands without looking down.
- Keep the touchpad clear of accidental palm contact; you can adjust its sensitivity if needed.
- Do not worry about the laptop’s Fn key, arrow cluster or narrow number row yet. Begin with letter keys.
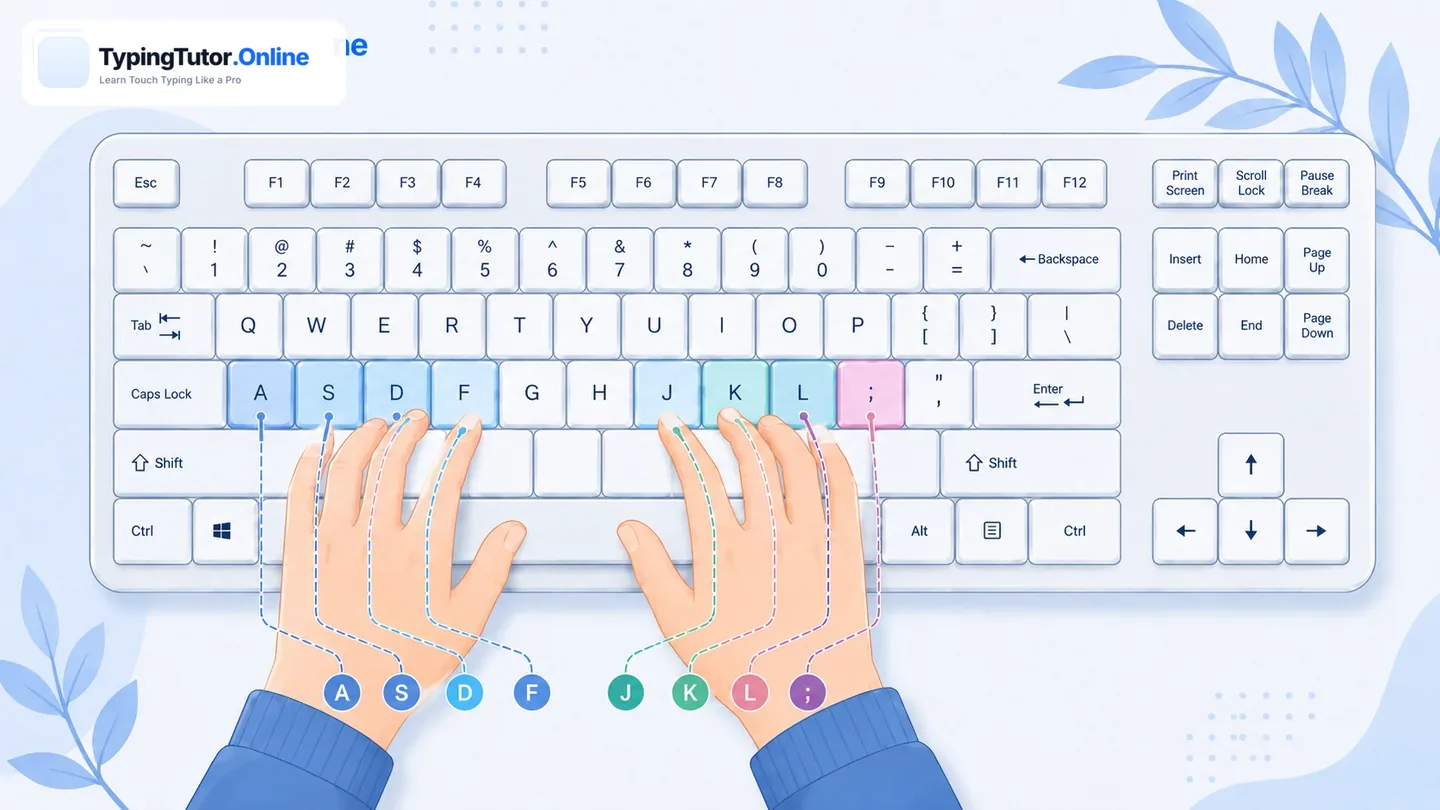
Step 1: Learn which finger presses each key
Start with the home row: A S D F under the left hand and J K L ; under the right hand. Rest your thumbs near Space. Instead of looking at every letter, use F and J to anchor your hands. As you learn new rows, each finger reaches to a nearby key and comes home again.
The finger-placement guide includes a complete map, while the free illustrated typing booklet explains the fundamentals for offline reading or printing.
Step 2: Open your first guided typing lesson
Open lesson 1. Read the highlighted character, press it with the recommended finger, and keep your eyes on the exercise rather than the keyboard. In the TypingTutor.Online workspace, typing starts when you press the first key; there is no need to race the clock on your first attempt.
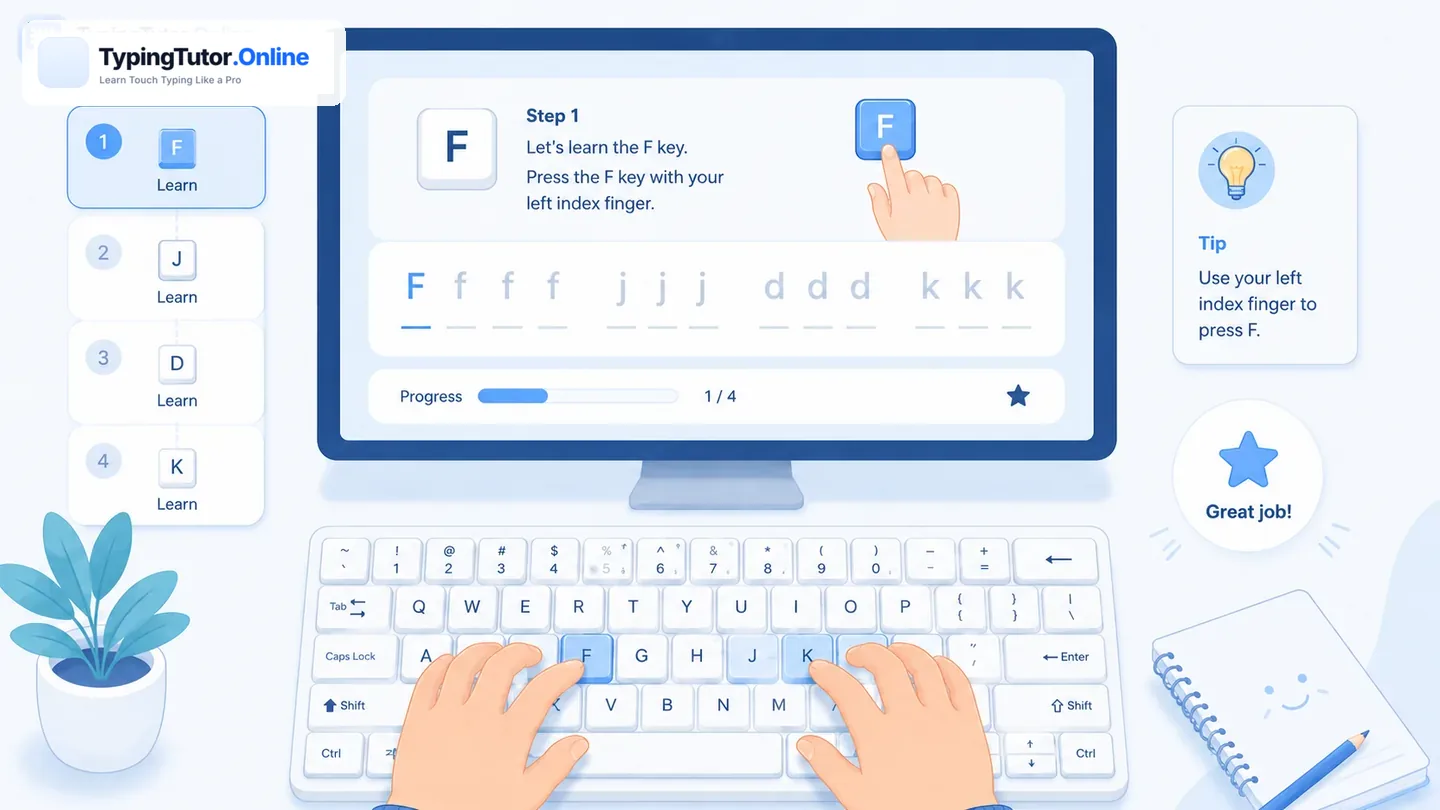
Repeat a lesson when the keys still feel uncertain. The free 60-lesson course gradually combines the home row with top-row keys, bottom-row keys, numbers, punctuation and longer text.
Step 3: Follow a short daily practice routine
- 2 minutes: Locate F and J and warm up with familiar keys.
- 5–8 minutes: Practise your current lesson slowly and accurately.
- 2–3 minutes: Review letters you missed, only while your hands feel comfortable.
- Optional short test: Once ready, use a 1-minute typing test to establish a baseline, not to judge your ability.
These times are examples, not a requirement. You can begin with shorter sessions and pauses. Note both words per minute (WPM) and accuracy; chasing WPM while making more errors is usually counterproductive.
How to learn typing on a computer keyboard versus a laptop
The letter layout is usually the same on a standard QWERTY keyboard. Full-size keyboards may have extra navigation keys and a number pad; laptops commonly place those controls in smaller spaces or behind an Fn combination. Start with the same home-row technique in either case. If you need number-pad skills for work, try the separate Numpad Tutor.
What about finger tiredness or pain during the first few days?
During the first few days, unfamiliar movements can make your fingers feel tired or awkward. Actual pain is not a required part of learning. If your fingers or hands hurt, tingle, go numb, feel weak, swell, or make everyday activities difficult—such as holding a cup of coffee or tea, or using utensils to eat—stop practising and rest. Do not try to type through the problem. Reduce session length, check wrist position and key-press force, and seek advice from a qualified healthcare professional if symptoms persist, recur or interfere with daily activities.
Some beginners adapt quickly while others need longer. It is not accurate to promise that finger pain will disappear after a set number of days or never return. See our typing-hand-comfort guide for practical workstation adjustments.
Step 4: Test, improve and track progress
Once your hands know the keys, practise typing without looking at the keyboard, use the Speed Improver for difficult key pairs, and review your WPM and accuracy trends. For structure, try a 7-day starter plan or a 10-day beginner typing plan. Improvement varies by learner; consistent, comfortable practice is the objective.
Frequently asked questions
Can I learn typing on a laptop for free?
Yes. TypingTutor.Online lessons and core typing tests work in a browser on a laptop keyboard. Start with home-row lessons and practise consistently without installing software.
What is the first thing I should learn in typing?
Learn your finger positions and the F/J home-row anchors, then type short groups of letters accurately before increasing speed.
How can I learn typing without looking at my keyboard?
Practise the same finger positions repeatedly, return to F/J after each movement and gradually keep your eyes on the screen. Use the dedicated no-look typing guide when you know the basic keys.
Is finger pain normal when learning typing?
Mild fatigue can occur, but pain or tingling should not be ignored. Stop if it hurts and seek professional advice for ongoing symptoms or difficulty using your hands in daily activities.