1. Prepare your keyboard and hands
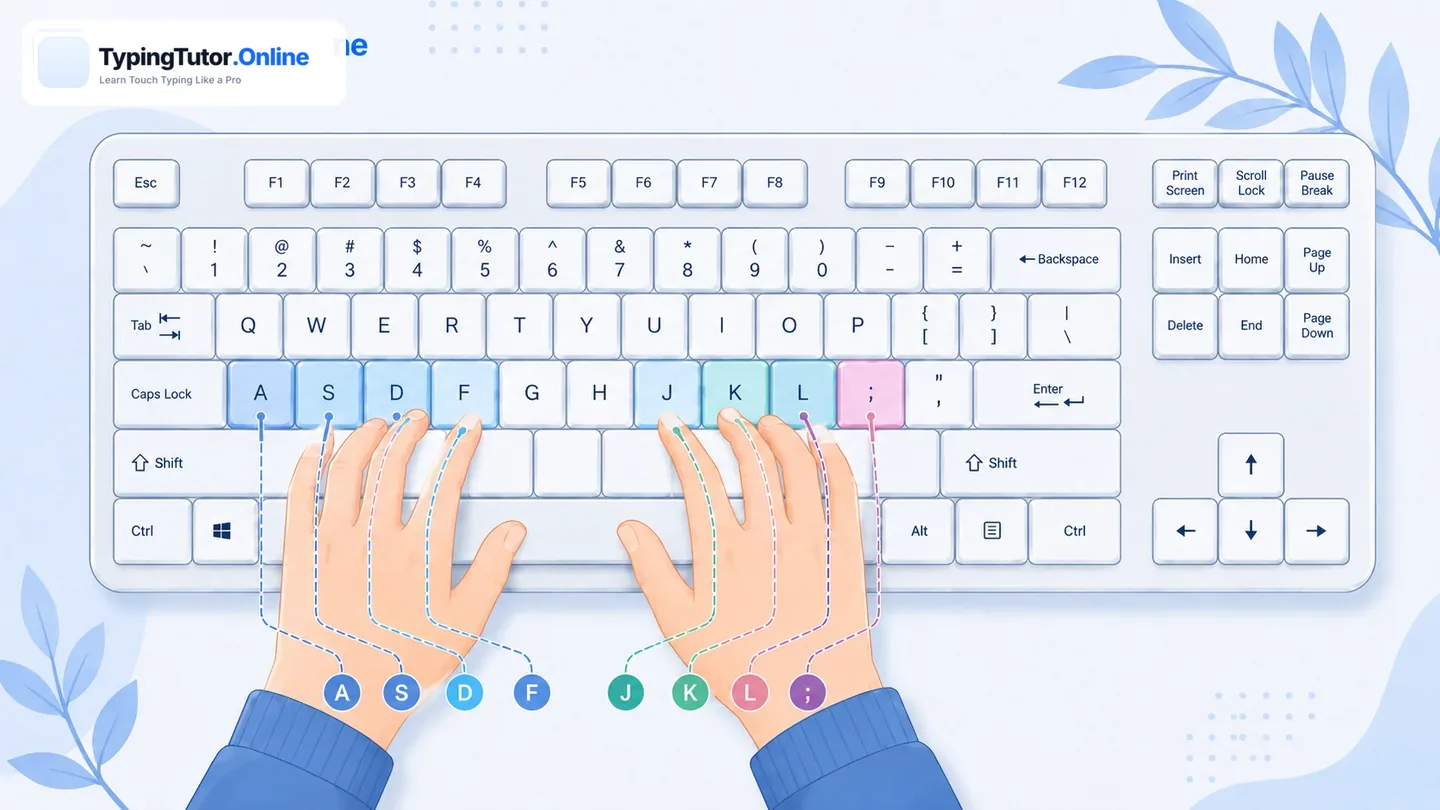
Sit comfortably with your screen in front of you and your shoulders relaxed. Keep your wrists neutral rather than pressing them firmly against the desk while typing. If you use a physical keyboard, locate the small raised guides on F and J. These marks help you find the starting position without looking down.
Rest your left fingers on A S D F and right fingers on J K L ;. Let your thumbs hover near the space bar. If you use a different keyboard layout, follow the layout and finger guidance available in the tutor.
2. Open the beginner typing course
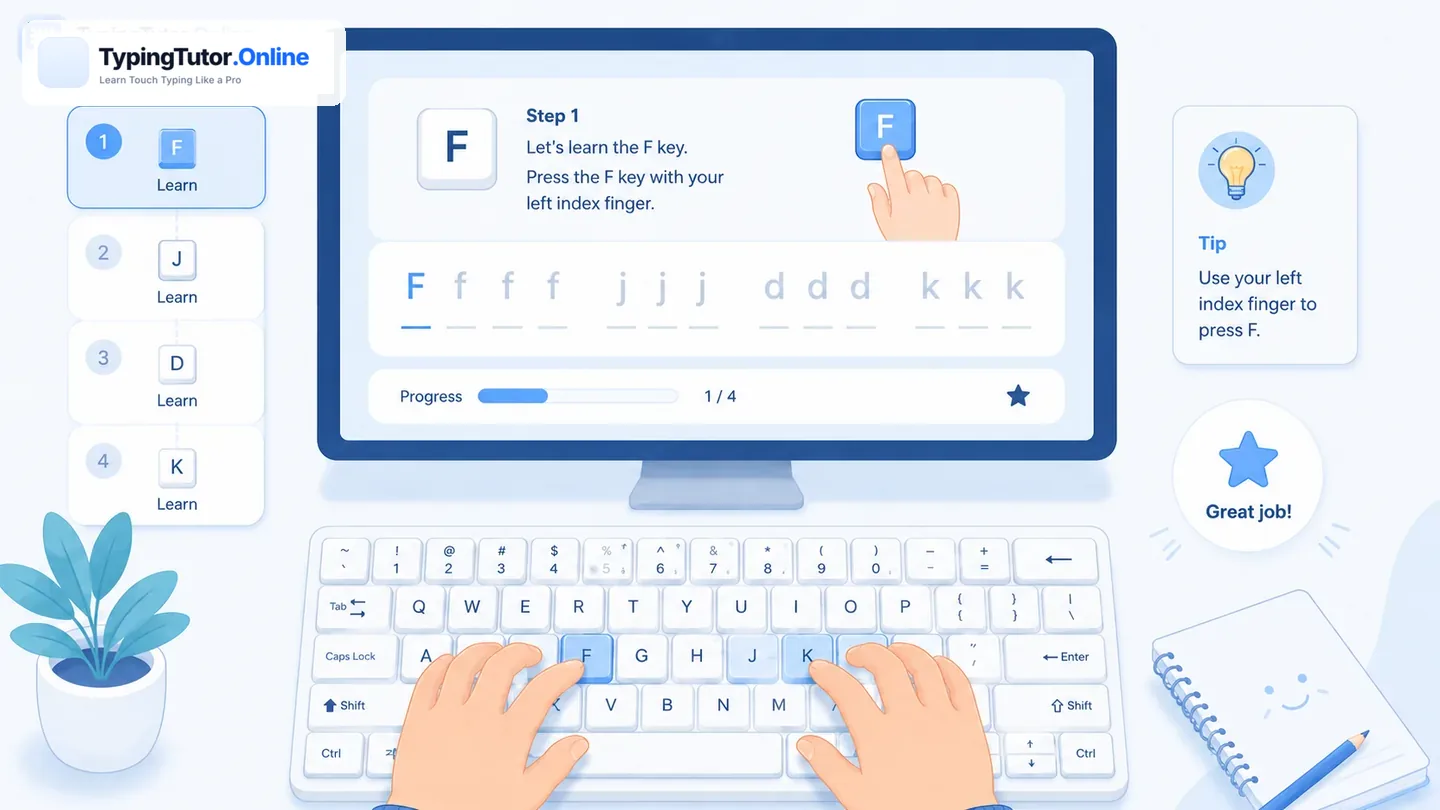
Visit the lessons overview to see the available learning paths, then open the guided typing lesson. The tutor highlights the current character and can show keyboard and hand guidance. The typing lesson begins with your first keystroke; you do not need to race against another user.
3. Type one character at a time
Look at the on-screen text, press the indicated key, and allow your finger to return to the home row after a reach. When you type an incorrect character, slow down and notice which finger or position was difficult. Aim for relaxed, accurate movement instead of memorizing a single passage by speed alone.
4. Read your result and choose the next step
At the end of a lesson, review the speed and accuracy feedback. A slow but accurate session is a useful beginning. If you made many mistakes, repeat the same lesson before moving forward. If the keys now feel familiar, continue with the next lesson. You can also use Today’s Practice for a simple daily routine.
5. Establish a sustainable practice habit
Try a short lesson each day, then add a quick review of the keys you missed. Avoid forcing long sessions or pushing through discomfort. Once you can type a short passage smoothly, take a typing test to establish your baseline and compare later results.
Start with accuracy. Learn just enough new keys to stay comfortable, revisit mistakes, and use typing games as a fun extra—not a substitute for learning where your fingers belong.
Beginner checklist
- I found F and J without looking at the keyboard.
- I placed both hands on the home row.
- I completed at least one guided lesson.
- I noticed which keys caused mistakes.
- I know whether to repeat the lesson or continue.