Typing Tutor with Hand Position: Visual Finger Guide
Want a typing tutor with hand position guidance? TypingTutor.Online shows the next key alongside an interactive on-screen keyboard and its built-in Hand Guide. Rather than memorizing a diagram separately, you can see which finger belongs on the highlighted key during a real lesson. This visual typing practice is available with the free beginner course.
How the visual Hand Guide works
Each time a lesson highlights a target character, the keyboard identifies the corresponding key. You can display a hand style that helps you see the intended finger placement at the same time. This is useful for typing practice with hand placement, especially while you are learning the home row or correcting a habit of pressing keys with whichever finger happens to be nearest.
- Open a lesson from the 60-lesson touch-typing course.
- Find the highlighted key in the text and on the on-screen keyboard.
- Look at the Hand Guide to identify the finger that should reach that key.
- Press the key gently, return toward the home position, and continue at a comfortable pace.
- Switch the hand style if another visualization is easier to understand.
This is a guide to finger assignment, not a camera that detects your physical hands. Your browser does not need a webcam to show the guide. As your muscle memory improves, try relying less on the display and more on the movement you have practised.
Learn hand position before you start typing
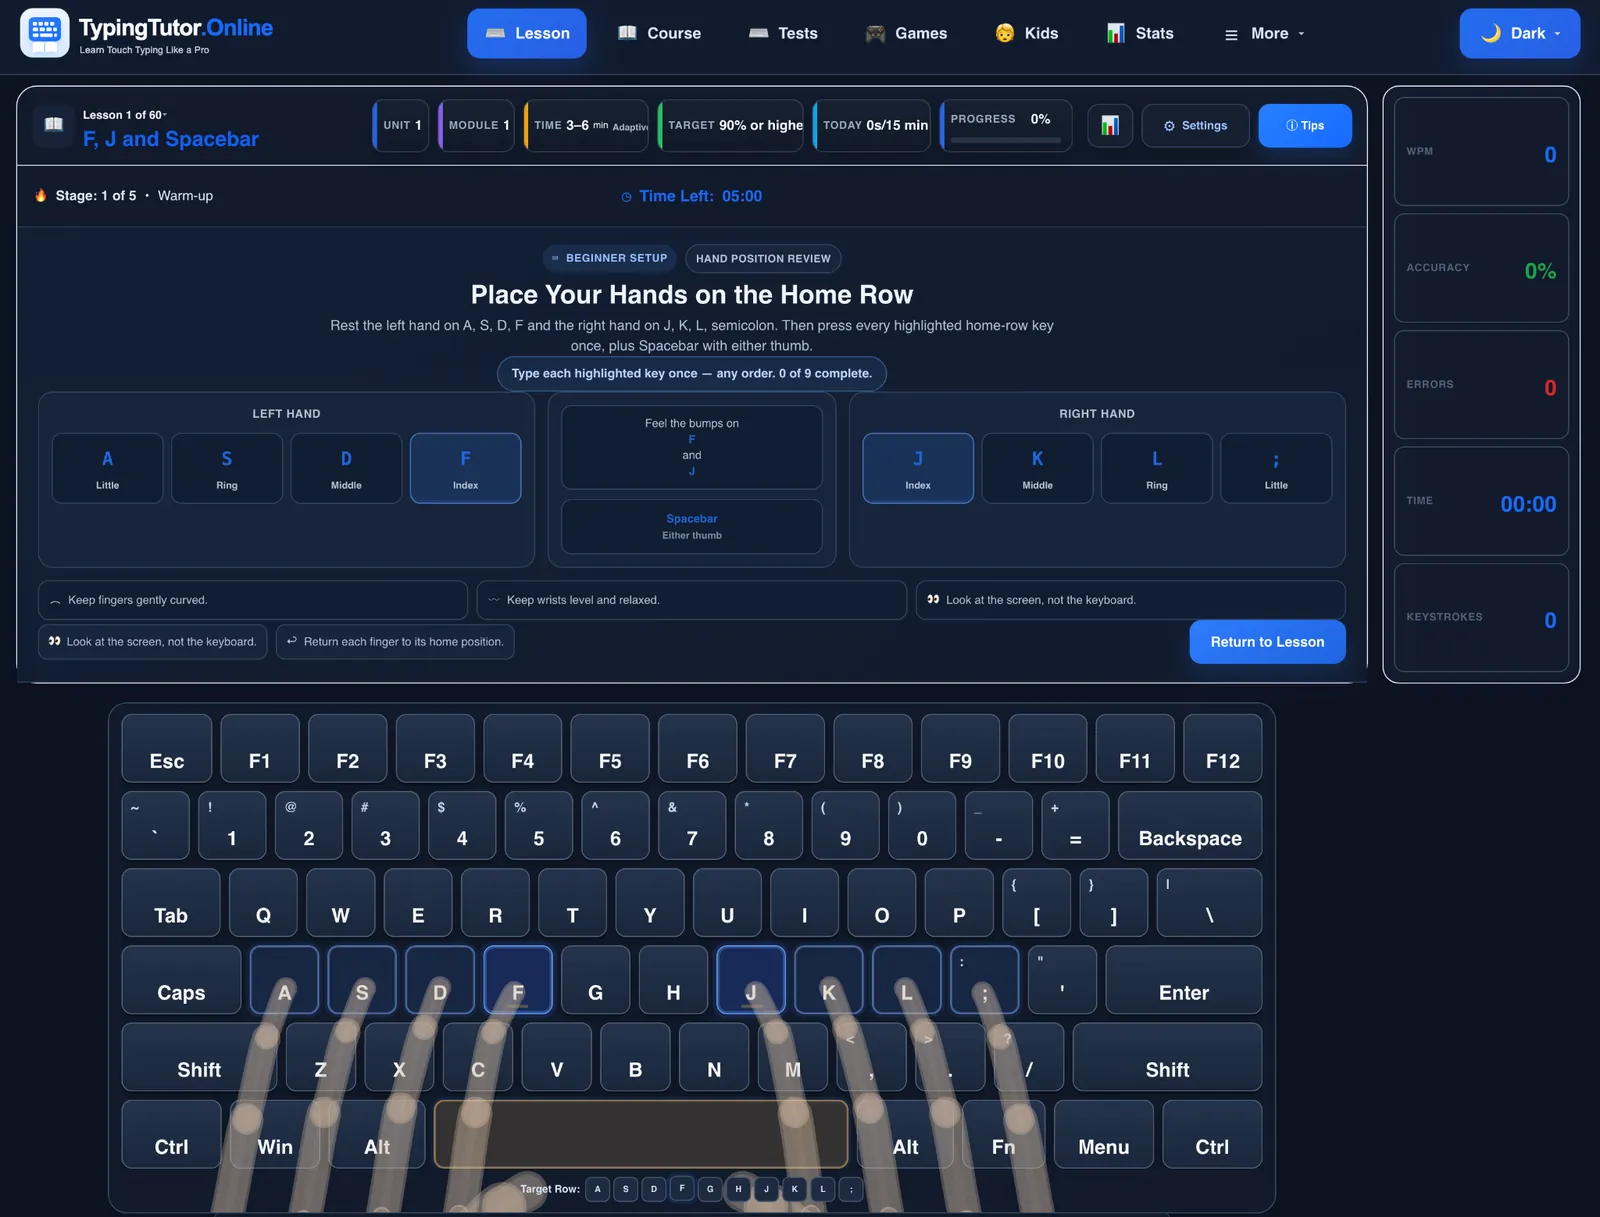
Begin at Lesson 1: F, J and Spacebar. The first-lesson hand-position review introduces the eight home-row fingers: left-hand A S D F and right-hand J K L ;. Use the raised marks on F and J as tactile anchors, and use a comfortable thumb for Space. These anchors help you locate your hands without repeatedly looking down.
Start slowly. A visible target key and the on-screen hand placement work together: the target tells you what to type and the guide helps you see which finger should type it. If you need a printable overview, the touch-typing finger chart shows the full QWERTY assignments, and the free typing booklet explains the basics.
Choose from four Hand Guide styles
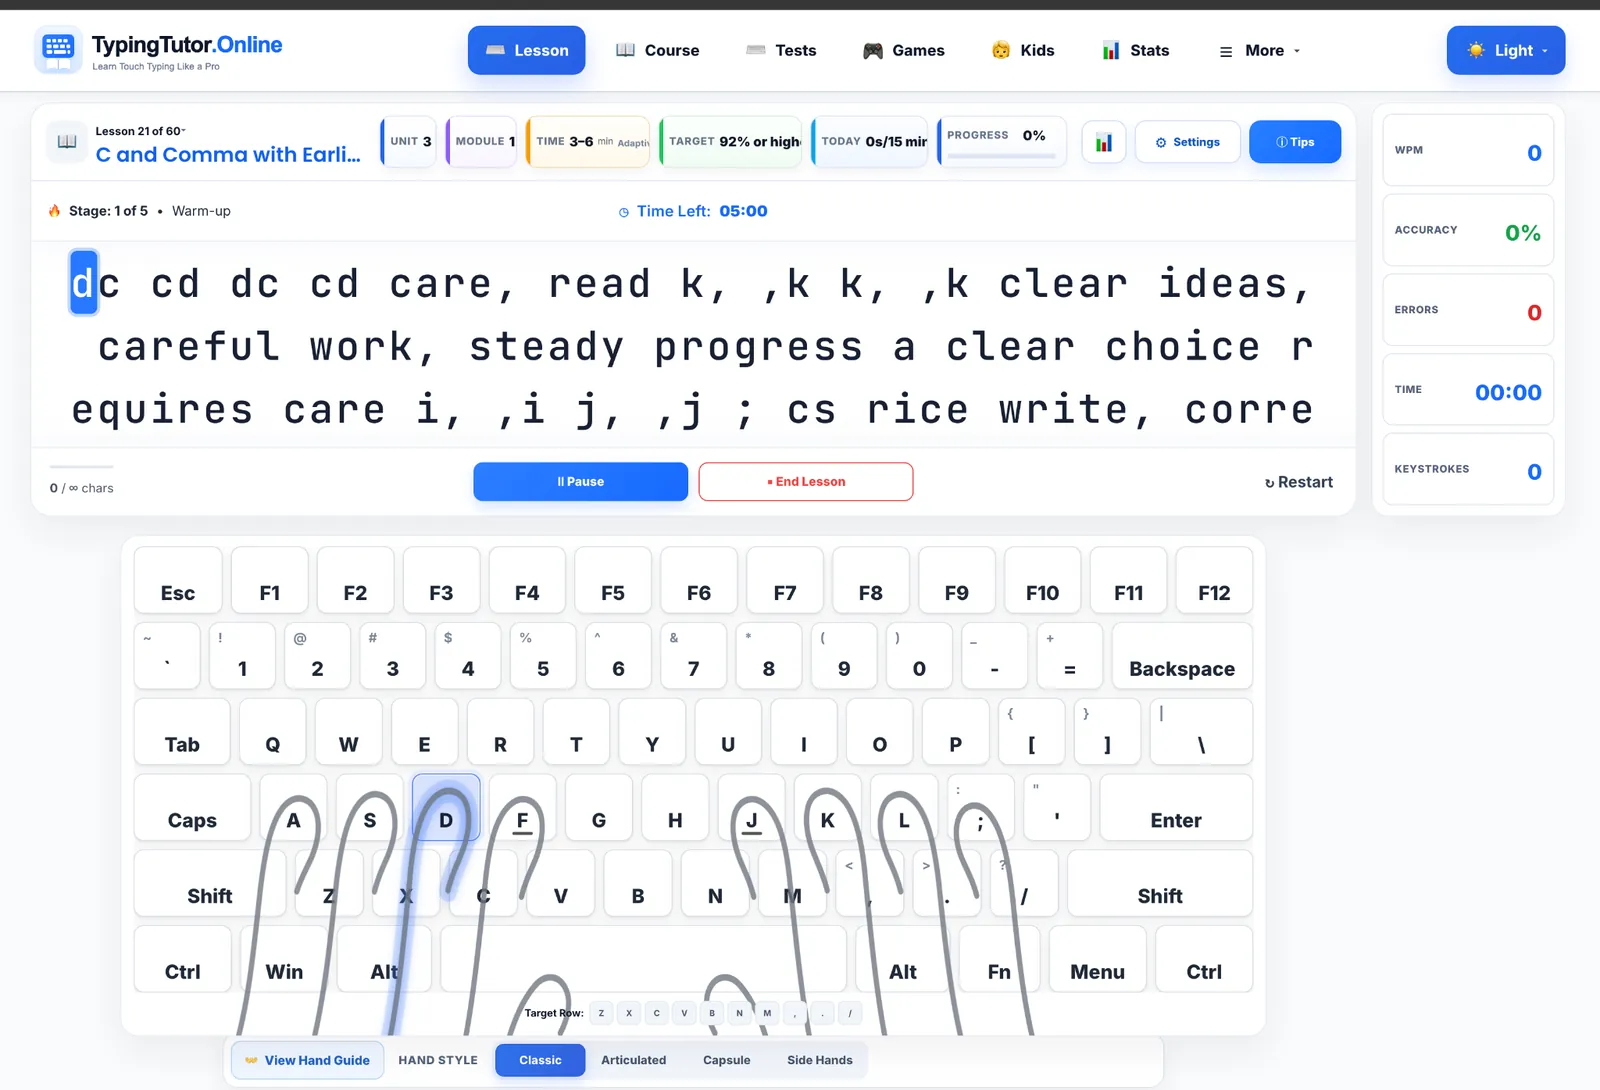
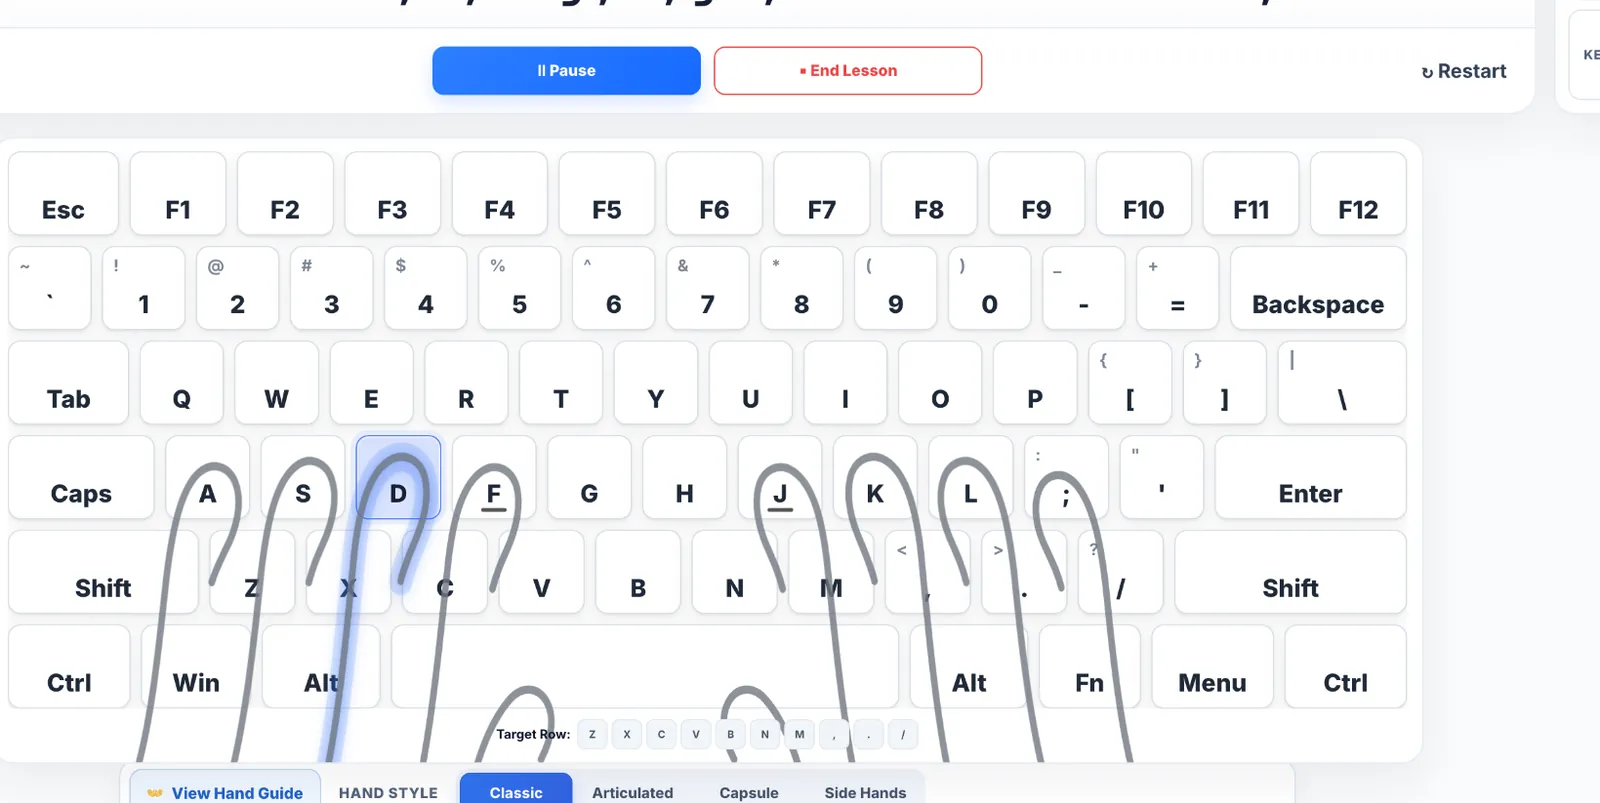
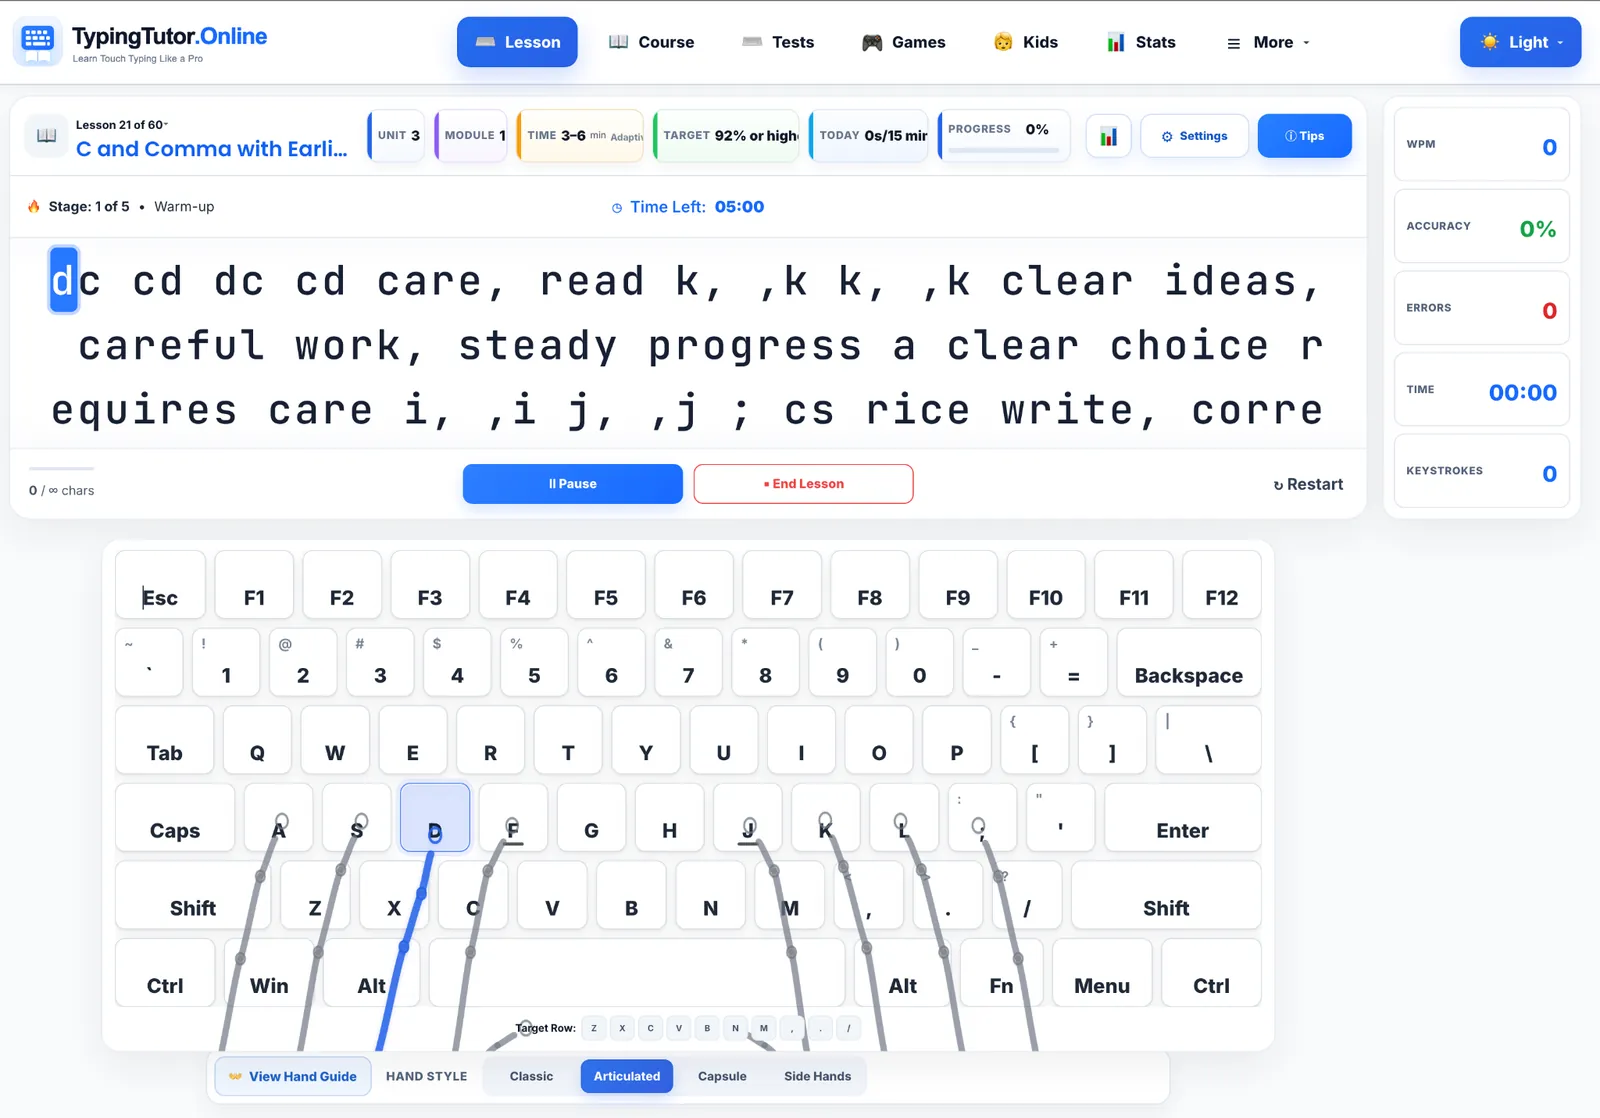
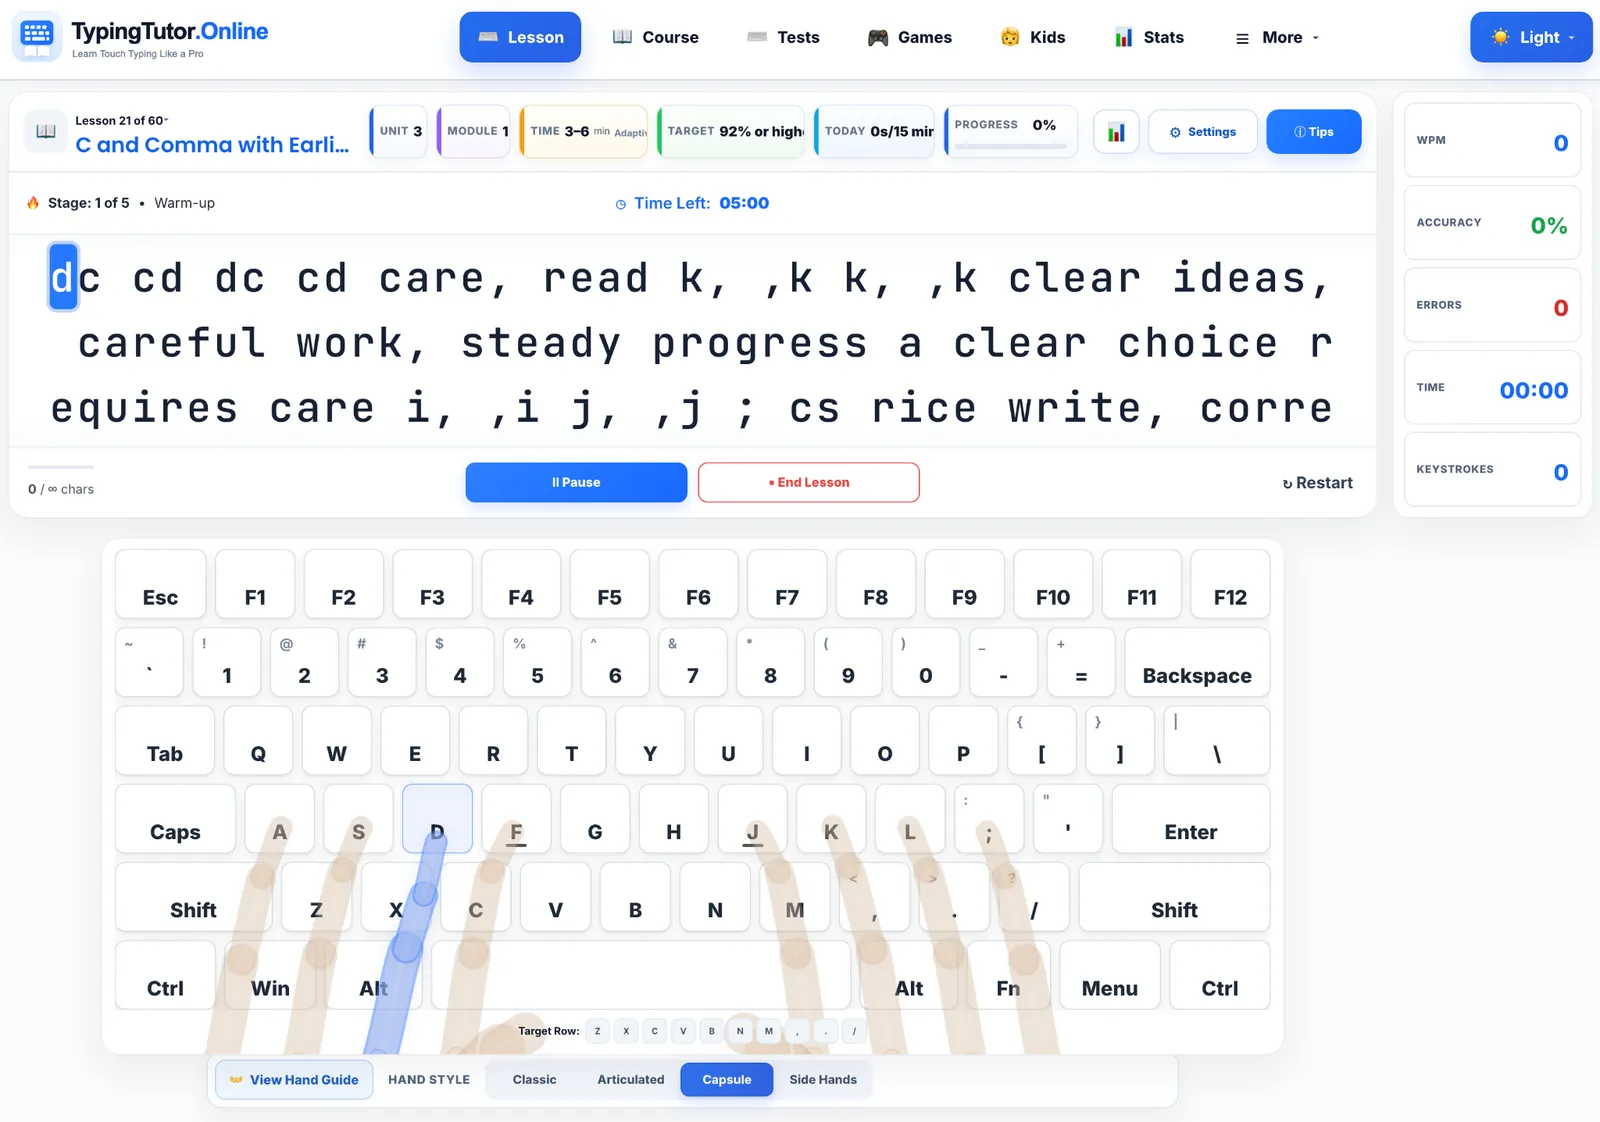
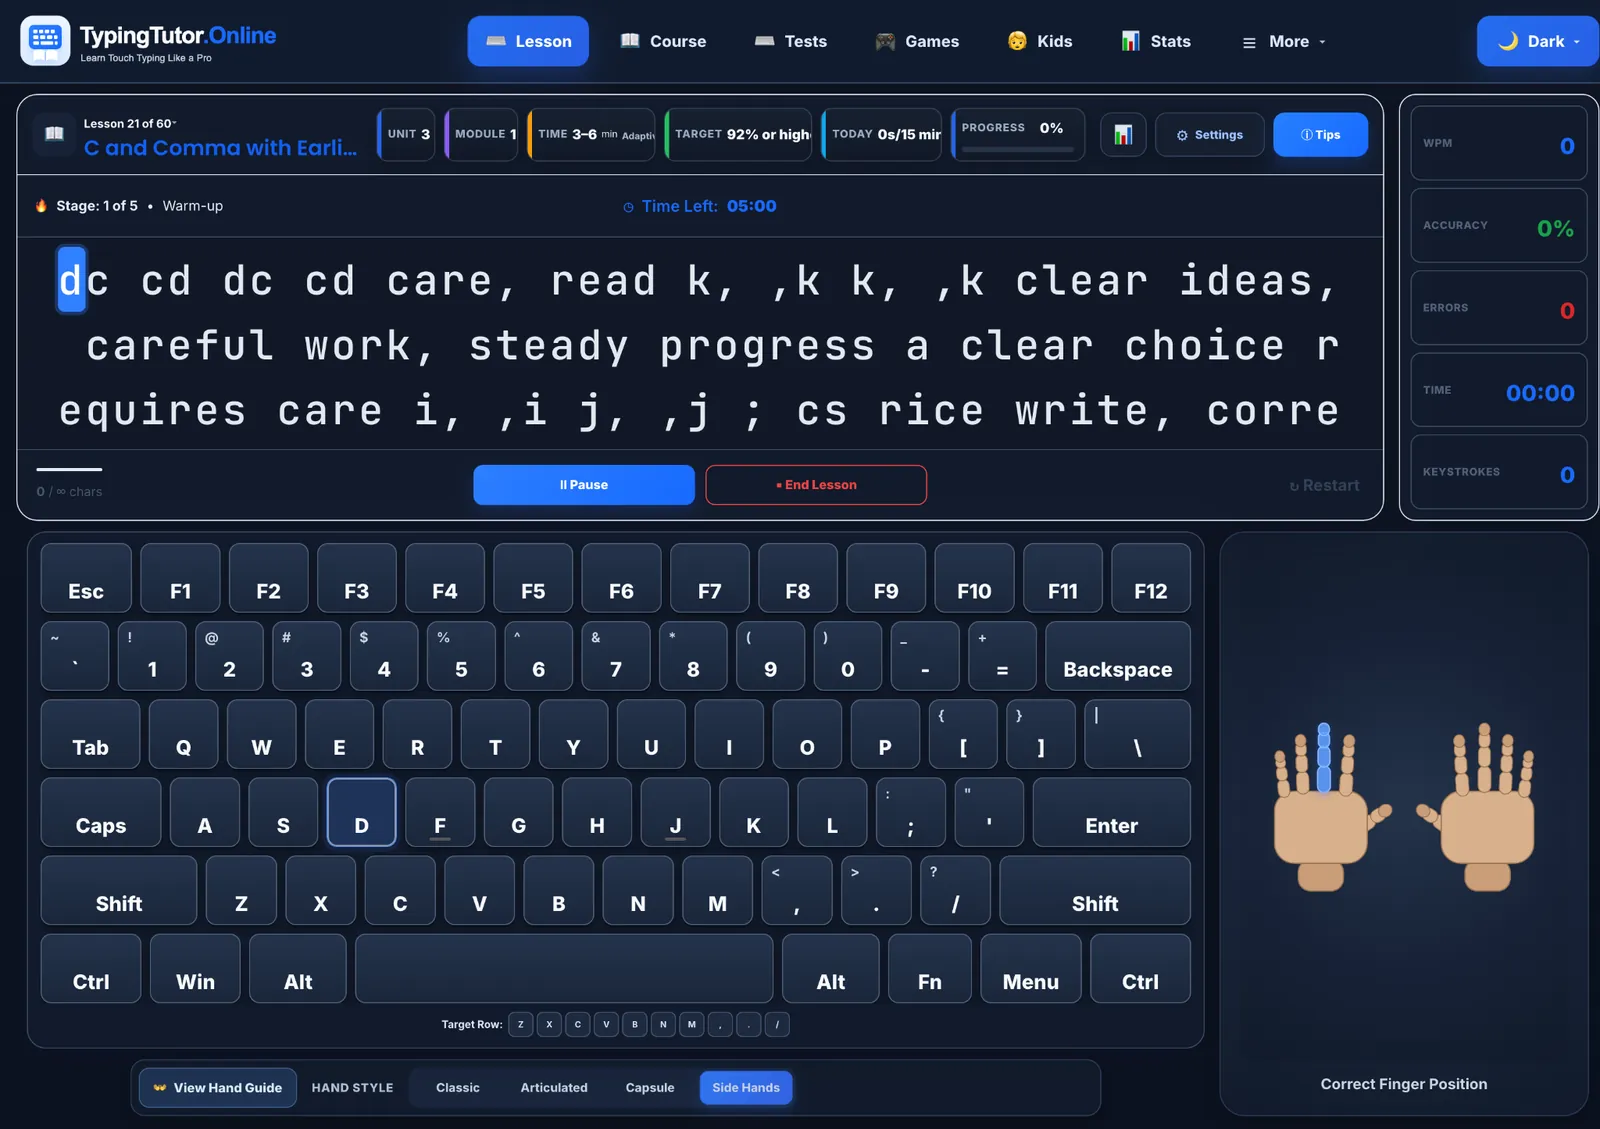
Different visual learners prefer different levels of detail. The lesson controls provide Classic, Articulated, Capsule, and Side Hands options. The following are screenshots from the actual TypingTutor.Online lesson interface; the blue highlight shows the active finger or target.
Classic — simple finger paths
The Classic view draws a clear route from each finger’s starting region toward the relevant keys. It is a practical starting option if you want an easily readable typing tutor with hands on the same screen as the exercise.
Articulated — detailed jointed finger movement
The Articulated view uses connected, jointed shapes to make finger paths easier to distinguish. It can be useful when learning the difference between nearby fingers, such as the middle and index fingers.
Capsule — softer translucent hand shapes
Capsule presents the hands in a softer, rounded visual style while retaining the highlighted target finger. Choose it if a more anatomical overlay helps you follow the motion.
Side Hands — separate hand illustration
Side Hands presents hand graphics beside the keyboard instead of overlaying every key. You can still see the intended finger clearly, but the keys remain relatively unobstructed. The screenshot below also shows the Hand Guide working in dark mode.
Start with Classic if you are new. Try Articulated if you want more detailed finger paths, Capsule if you prefer rounded overlays, or Side Hands if you want the keyboard to stay visually clear. There is no required mode; choose the one you can follow comfortably.
Typing practice with left and right hand placement
Your left hand usually starts on A, S, D and F, while your right hand starts on J, K, L and semicolon. Each finger reaches toward nearby letters on the upper or lower rows before returning toward its home-row position. During typing practice with left hand and typing practice with right hand movements, the Hand Guide shows which finger should take the next key in the full two-hand course.
Want to concentrate on one side while improving? Slow down and pay extra attention when a left-hand or right-hand key appears, then review weak keys in Statistics or use the Typing Speed Improver. TypingTutor.Online does not claim a dedicated one-handed typing curriculum; its standard lessons and Hand Guide teach conventional two-hand touch typing.
How to start using the Hand Guide today
- Open the first lesson or return to your current lesson.
- Look below the on-screen keyboard for View Hand Guide and the Hand Style choices.
- Choose Classic, Articulated, Capsule or Side Hands. You can switch if a view feels distracting.
- Look at the highlighted target letter, use the indicated finger, and type with relaxed hands.
- After the lesson, check WPM and accuracy. Use your 7-day practice plan or progress guide to keep learning.
New learners should focus on accuracy and comfort before speed. Take breaks as needed; finger pain, numbness, weakness, or difficulty holding everyday objects is a reason to stop rather than push through. Read our hand position and posture guide for ergonomic tips.
Hand Guide questions
Is there a free typing tutor with hand position?
Yes. TypingTutor.Online's core lesson course includes an on-screen keyboard and Hand Guide for visual finger placement practice.
Does TypingTutor.Online show which finger should press a key?
Yes. The typing lesson highlights the target key and the Hand Guide shows the intended finger assignment. It does not track your physical hands with a camera.
What are the four Hand Guide styles?
Classic, Articulated, Capsule and Side Hands. They show finger guidance in different visual layouts while the typing lesson remains the same.
Can I practise with the left hand or right hand?
The standard two-hand lessons show left- and right-hand finger assignments. For weak keys on one side, review your accuracy and practise difficult keys; a separate one-handed course is not advertised.
Do I have to keep the hands visible?
No. You can select a preferred Hand Guide view and focus on the typing exercise. As you learn, rely on memorized finger movements rather than staring at the guide.